You have an app that calls OpenAI directly. You want failover, cost tracking, and the ability to switch providers — but you don't want to rewrite your application code. This guide walks you through adding DeltaLLM as a gateway in front of your existing setup in under five minutes.
Before: Direct OpenAI Calls
Here's the typical starting point:
from openai import OpenAI

client = OpenAI(api_key="sk-...")

response = client.chat.completions.create(
    model="gpt-4o",
    messages=[{"role": "user", "content": "Summarize this document..."}]
)
This works fine until OpenAI has an outage, you hit rate limits, or you realize another model handles your task better for less money. Let's fix all three at once.
Step 1: Start DeltaLLM
Clone the repo, copy the example config, add your API keys, and start with Docker Compose:
git clone https://github.com/deltawi/deltallm.git
cd deltallm
cp config.example.yaml config.yaml
# Edit config.yaml — add your OpenAI key (or any provider)

docker compose --profile single up -d --build
DeltaLLM is now running at http://localhost:4002. The Admin UI is accessible at the same address, and the OpenAI-compatible API lives at /v1.
Step 2: Create an API Key
Instead of sharing your raw OpenAI key with every service, create a virtual key with its own spending limit. The easiest way is through the Admin UI:
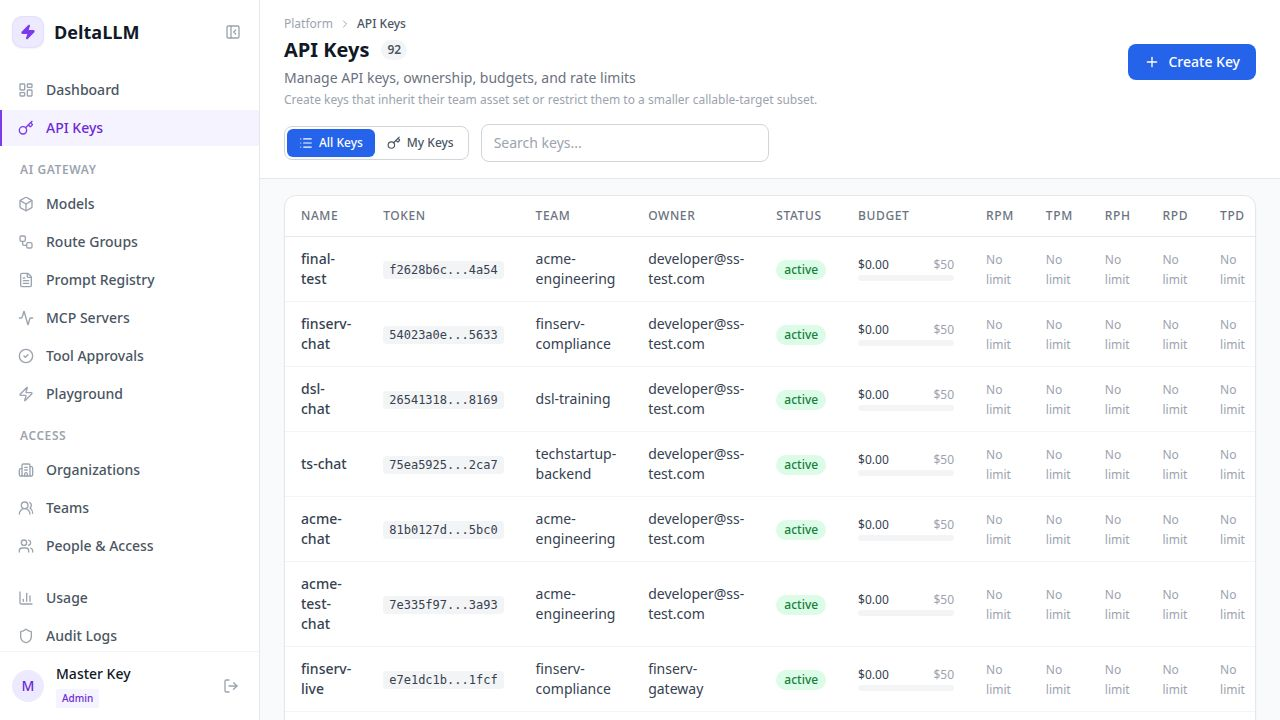
You can also create keys via the API:
curl -X POST http://localhost:4002/ui/api/keys \
  -H "Authorization: Bearer $DELTALLM_MASTER_KEY" \
  -H "Content-Type: application/json" \
  -d '{"key_name": "my-app", "max_budget": 50}'
The response includes a raw_key — that's what your app will use.
Step 3: Change One Line in Your App
Here's the entire code change:
from openai import OpenAI

client = OpenAI(
    base_url="http://localhost:4002/v1",  # ← just this line
    api_key="sk-deltallm-your-key"
)

# Everything else stays exactly the same
response = client.chat.completions.create(
    model="gpt-4o",
    messages=[{"role": "user", "content": "Summarize this document..."}]
)
That's it. Same SDK, same code, same response format. Your app now routes through DeltaLLM.
Step 4: Add a Fallback Provider
Now add automatic failover. If OpenAI returns a rate-limit or server error, DeltaLLM retries on Anthropic — without your app knowing anything failed:
# config.yaml
model_list:
  - model_name: gpt-4o
    deltallm_params:
      model: openai/gpt-4o
      api_key: os.environ/OPENAI_API_KEY

  - model_name: claude-fallback
    deltallm_params:
      model: anthropic/claude-3-5-sonnet-20241022
      api_key: os.environ/ANTHROPIC_API_KEY

deltallm_settings:
  fallbacks:
    - gpt-4o:
- claude-fallbackgpt-4o. The gateway handles the fallback transparently — your code never sees the switch happen.Step 5: See Your Spend
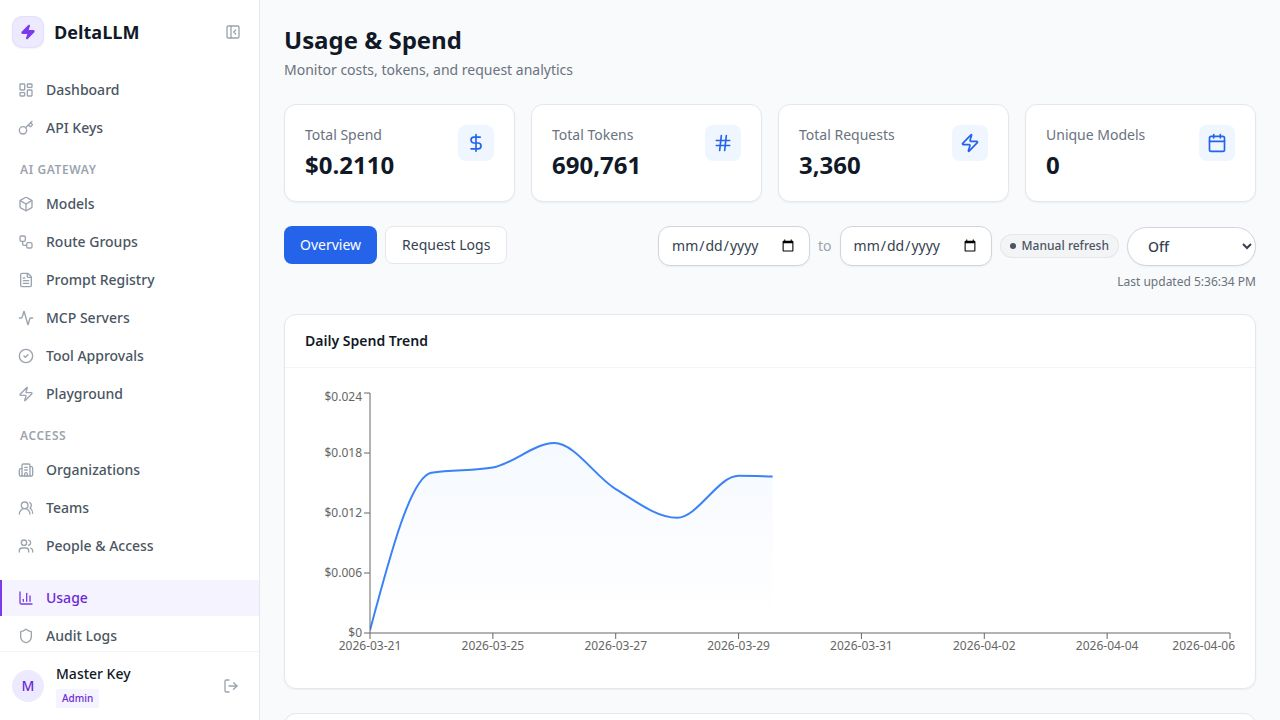
Every request is now tracked. Open the Usage & Spend page in the admin dashboard to see cost breakdowns by model, key, and time:
What You Get
- One line changed in your app
- Automatic failover across providers
- Per-key spend tracking with budget limits
- Full OpenAI SDK compatibility — Python, JavaScript, any language
- An admin dashboard to manage everything without touching config files
The rest of your application is untouched. That's the point of the gateway pattern.